Historical Data
You can view or export historical data for any symbol. The Historical Data panel is a "temporary panel" -- it cannot be added to a workspace.
- Click the + button, found on the bottom right of the application. From the Tools grouping in the panel chooser, click Historical Data.
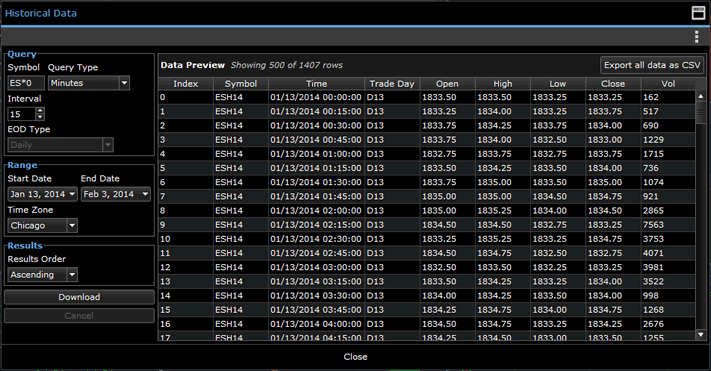
Result: The Historical Data dialog appears. - FIRST - Set up the Query using the options on the left side of the dialog box:
Option Description Symbol The symbol for which you want to view/export Historical Data. Query Type Select the time frame from the drop-down list. Options include Ticks, Minutes, Minutes Nearby, and End of Day. Interval For Minutes and Minutes Nearby queries, identify the desired minute interval. EOD Type When the Query Type is set to End of Day, select the type of End of Day data to retrieve.
Options include Daily, Daily Nearest, Daily Continuation, Weekly, Weekly Nearest, Weekly Continuation, Monthly, Monthly Nearest, and Monthly Continuation.
For more information on these settings, see the topic Chart Time Ranges / Intervals.Range Identify the Start and End Dates, along with the Time Zone. Time Zone The time zone in which the time stamps will be generated. Results Order Identify how you want the data to be sorted, either in Ascending or Descending sequence. - Click the Download button, on the left side of the panel.
Result: Data is retrieved and displayed in the right side of the panel. - NEXT -- If you wish to Export the results shown, click the Export all Data as CSV button at the top right of the panel.
- Click Close when done to close the panel.
Note: The Historical Data panel cannot be added to a workspace. It is a "temporary panel", used to only display or export data.